|
随这计算机软硬件的发展,计算机不在只是一个简单的计算工具而成为了一个可以玩游戏、进行多媒体操作的多功能平台。为了编写高性能的游戏和应用程序,我们需要绕过操作系统提供的API直接操作硬件以充分利用硬件的加速效果,但是由于现在的计算机配件数以万计,那么我们在编写程序时需要为每一类编写代码。这样就大大的浪费了资源。现在有了DirectX,这个问题就解决了,硬件厂家只要根据DirectX要求编写驱动程序,而程序员只要同单一的DirectX库打交道而基本不用顾及具体的硬件,这样不但大大的简化了编程而且也提高了程序性能。
由于微软的影响力,DirectX库已经成为了游戏开发的标准之一。过去要进行DirectX开发只能使用复杂的C++,不过自从DirectX7发布以来,微软同时也发布了DirectX的VB开发库,这样我们业可以使用VB来开发基于DirectX的游戏和应用程序了。
完整的DirectX7 SDK库有139M大,其中包括了VB、VC开发库,在线开发文档,范例程序以及一些实用程序。只有至少安装了开发库中的VB部分以后,才可以来开发DirectX程序。
安装好DirectX开发库之后,打开VB,点击菜单的 Project | References 项打开References对话框,可以发现在列表中多了一项:DirectX 7 For Visual Basic Type library,点击该项,就可以把DirectX库加入到VB工程中。下面文章中编写每一个范例前都要首先进行上面的操作将DirectX 7 For Visual Basic Type library加入到VB工程中。
DirectX7开发库是基于对象的,其中最基本的对象是DirectX7对象,只有在程序中首先建立了DirectX7对象之后才可以在该对象的基础上建立其它对象。DirectX基本对象包含以下几类:
DirectDraw类 独立于设备的平面绘图对象,支持以全屏方式或者窗口方式绘图。DirectDraw支持对显存的直接操作。一旦定义DirectDraw对象并锁定,就可以象操作一个数组一样的操作显存中的内容了。
Direct3D类 DirectX三维绘图接口,包括立即模式(Immediate Mode)和保留模式,是绝大部分的三维DirectX游戏的基础。Direct3D类对象独立于设备。
DirectSound类 DirectX中的Wave音频对象,独立于设备,支持混音、硬件加速、直接设备访问、声音捕捉和回放。
DirectMusic类 音乐数据文件操作对象,支持DLS(downloadable sounds)标准,支持运行时编辑。
DirectInput类 独立于设备的游戏控制器对象,支持鼠标、键盘、游戏杆,并且支持力反馈游戏杆。
DirectPlay类 为支持多任游戏而设计的对象,支持不同的计算机通过网络、Internet或者Modem进行互连。支持建立游戏服务器,用户可以登陆到服务器上并纪录用户信息。可以协调速度不同的计算机之间的信息传递(例如一个使用专线和一个使用低速Modem的计算机之间)。
一、 DirectDraw
DirectDraw类是DirectX中绘图的基础,它包含以下的对象:
· DirectDraw7
· DirectDrawClipper
· DirectDrawEnumModes
· DirectDrawPalette
· DirectDrawSurface7
DirectDraw7是基本的DirectDraw类对象,它是建立其它对象的基础,DirectDraw7对象要通过DirectX7对象的DirectDrawCreate方法来建立。例如下面的语句就可以建立一个DirectDraw对象:
Dim objDx As New DirectX7
Dim objDraw As DirectDraw7
Set objDx = New DirectX7
DirectDrawClipper对象可以建立一个屏幕的剪裁区域的列表。该对象的一个通常的应用是设置屏幕或者窗口区域,例如在你的游戏中有一个人物移动到了屏幕的边缘,你不希望他一下消失掉而是要平滑的移出,如果没有DirectDrawClipper对象的话这将后台的图像复制到前台会出现错误,因为人物图像的一部分已经移动到了绘图平面的外面,而有了DirectDrawClipper对象,DirectDraw就知道人物图像区域的那些部分是可见的而那些部分应该被剪裁掉。利用DirectDraw7的CreateClipper方法可以建立一个DirectDraw7下的DirectDrawClipper对象
通过DirectDrawEnumModes对象可以获得当前系统支持的显示模式。DirectDraw7的GetDisplayModesEnum方法可以建立一个DirectDrawEnumModes对象。
DirectDrawPalette对象是DirectDraw下的绘图调色板对象,它很类似于Windows下的调色板。DirectDraw7的CreatePalette方法可以建立一个DirectDrawPalette对象。
DirectDrawSurface7是DirectDraw下的最重要的对象,它有点类似Windows下窗口的hDC,我们所进行的所有图形、文本操作都是在这个对象上进行的。这个对象描述了一块线型的显存区域,你可以通过DirectDrawSurface7对象直接操作这片区域。如果你还记得在Dos下的QB4.5编写图形程序的话,DirectDrawSurface7对象就同它有一些类似。通过DirectDraw7的CreateSurface方法,你可以建立一个单一绘图平面、复合绘图平面或者三维绘图平面对象。而利用DirectDraw7的CreateSurfaceFromFile方法、CreateSurfaceFromResource方法可以建立一个包含位图的 DirectDrawSurface7对象。DirectDrawSurface7对象是DirectDraw类对象中最难掌握的对象。
下面我们将通过建立一个简单的DirectDraw程序并通过充实程序来学习DirectDraw的基本原理和应用。首先来建立一个简单的DirectDraw程序,建立一个新的工程,将Direct7说明库加入到工程中,然后在Form1中加入两个CommandButton和一个ListBox控件,在Form1中加入以下代码:
Option Explicit
Dim objDx As New DirectX7
Dim objDraw As DirectDraw7
Dim objEnumModes As DirectDrawEnumModes
Sub Cleanup() 'Cleanup函数回复屏幕并且清除DirectX对象
Call objDraw.RestoreDisplayMode
Call objDraw.SetCooperativeLevel(Me.hWnd, DDSCL_NORMAL)
Set objDraw = Nothing
Set objDx = Nothing
End
End Sub
Private Sub Command1_Click()
CleanUp
End Sub
Private Sub Form_Load()
Command1.Caption = "结束"
Command2.Caption = "设置显示模式"
On Error GoTo ErrHandler:
Dim ddsd As DDSURFACEDESC2
Dim I As Long, lgCount As Long
Set objDx = New DirectX7
'建立 DirectDraw 对象
Set objDraw = objDx.DirectDrawCreate("")
'将DirectDraw对象支持的显示模式设置到DirectDrawEnumModes对象中
Set objEnumModes = objDraw.GetDisplayModesEnum(DDEDM_DEFAULT, ddsd)
'将数据设置到ListBox中
lgCount = objEnumModes.GetCount()
For I = 1 To lgCount
objEnumModes.GetItem I, ddsd
List1.AddItem CStr(ddsd.lWidth) & "x" & CStr(ddsd.lHeight) & "x" _
& CStr(ddsd.ddpfPixelFormat.lRGBBitCount)
Next I
ErrHandler:
Select Case Err.Number
Case 0 ''没有错误
Case Else
Err.Raise Err.Number, Err.Source, Err.Description, Err.HelpContext, _
Err.HelpContext
Call Cleanup
End Select
End Sub
Private Sub Form_Unload(Cancel As Integer)
Cleanup
End Sub
程序的运行结果如下图:
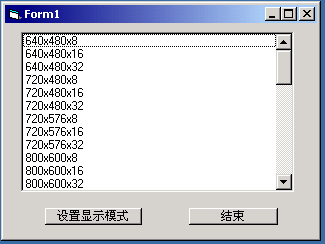
上面的范例首先演示了如何建立一个简单的DirectDraw对象并获得该对象支持的显示模式。下面我们要将在原来程序的基础上添加一些模块以实现更多的功能。
首先在上面的程序中加入一个函数SetNewDisplayMode,函数代码如下:
Private Function SetNewDisplayMode()
On Error GoTo ErrHandler
Dim ddsd As DDSURFACEDESC2
Dim i As Long
i = List1.ListIndex
If i = -1 Then
MsgBox "请在列表中选择一种显示模式", vbOKOnly, "错误"
Exit Function
End If
objEnumModes.GetItem (i + 1), ddsd
''设置协作模式
objDraw.SetCooperativeLevel Me.hWnd, DDSCL_FULLSCREEN Or _
DDSCL_ALLOWMODEX Or DDSCL_EXCLUSIVE
''设置显示模式
objDraw.SetDisplayMode ddsd.lWidth,ddsd.lHeight, _
ddsd.ddpfPixelFormat.lRGBBitCount, _
0, DDSDM_DEFAULT
Me.Refresh
ErrHandler:
Select Case Err.Number
Case 0 ''No Errors
Case Else
Err.Raise Err.Number, Err.Source, Err.Description, Err.HelpContext, _
Err.HelpContext
Call Cleanup
End Select
End Function
在Command2的Click事件中加入以下代码:
Dim i
For i = 0 To Form1.Controls.Count - 1
Form1.Controls(i).Visible = False
Next i
SetNewDisplayMode
再次运行程序,点击列表中的任意一个显示模式,然后点击"设置显示模式"按钮,可以看到屏幕的显示模式被设置成了你在列表中选择的模式。
上面介绍的是如何设置显示模式,下面介绍如何利用DirectSurface对象来进行图形绘制以及如何利用前台绘图平面同后台绘图平面相配合工作。这个程序要实现的目的是:在屏幕上显示一幅背景位图,然后有一个角色在屏幕上移动。为了实现上面的目的,我们需要建立四个绘图平面,一个主平面,就是程序运行时可以看到的平面;一个后台缓冲平面,用于进行图像操作;一个位图平面,用于显示背景位图;一个角色位图平面,用于显示角色位图。在程序运行时首先将背景位图贴到后台缓冲平面,然后将角色位图平面贴到后台缓冲平面,在后台缓冲平面输出一些提示文字,最后将后台缓冲平面的内容贴到主平面上。
为完成下面的程序,首先要在你的工程文件的目录下建立一个名字为Demo.bmp的位图文件最为背景和一个名字为 Sprite.bmp 的位图作为角色位图。在Form1中加入一个ListBox控件和两个CommandButton控件。加入Directx7说明库,然后在Form1的代码窗口中添加以下的代码:
Option Explicit
Dim objDx As New DirectX7
Dim objDraw As DirectDraw7
Dim objEnumModes As DirectDrawEnumModes
Dim MainSurf As DirectDrawSurface7
Dim BackSurf As DirectDrawSurface7
Dim BmpSurf As DirectDrawSurface7
Dim SpriteSurf As DirectDrawSurface7
Dim ddsd As DDSURFACEDESC2
Dim ddsd1 As DDSURFACEDESC2
Dim ddsd2 As DDSURFACEDESC2
Dim ddsd3 As DDSURFACEDESC2
Dim ddsd4 As DDSURFACEDESC2
Dim ddsd5 As DDSURFACEDESC2
Dim bRun As Boolean
Dim lastTime As Long
Dim fps As Long
Dim lfps As Long
Dim FrameCount As Long
Dim Clipper As DirectDrawClipper
Dim x As DDPIXELFORMAT
Dim sx, sy As Integer
Dim Pict() As Byte
Sub InitSurf()
On Error GoTo ErrHandler
'设置主绘图平面的属性
ddsd1.lFlags = DDSD_CAPS Or DDSD_BACKBUFFERCOUNT
ddsd1.lBackBufferCount = 1
ddsd1.ddsCaps.lCaps = DDSCAPS_COMPLEX Or DDSCAPS_FLIP Or DDSCAPS_PRIMARYSURFACE
'设置缓冲绘图平面的属性
ddsd2.ddsCaps.lCaps = DDSCAPS_BACKBUFFER
'根据ddsd1建立主绘图平面
Set MainSurf = objDraw.CreateSurface(ddsd1)
'将BackSurf设置为MainSurf的附加平面
Set BackSurf = MainSurf.GetAttachedSurface(ddsd2.ddsCaps)
'设置背景绘图平面的字体和颜色
BackSurf.SetForeColor RGB(255, 255, 255)
Form1.Font.Name = "宋体"
BackSurf.SetFont Form1.Font
'获得缓冲绘图平面的属性并设置到ddsd4中
BackSurf.GetSurfaceDesc ddsd4
'设置图形绘图平面的属性
ddsd3.lFlags = DDSD_CAPS Or DDSD_HEIGHT Or DDSD_WIDTH
ddsd3.ddsCaps.lCaps = DDSCAPS_OFFSCREENPLAIN
ddsd3.lWidth = ddsd4.lWidth
ddsd3.lHeight = ddsd4.lHeight
'建立图形绘图平面
Set BmpSurf = objDraw.CreateSurfaceFromFile(App.Path + "\demo.bmp", ddsd3)
'设定角色位图平面的属性
ddsd5.lFlags = DDSD_CAPS
ddsd5.ddsCaps.lCaps = DDSCAPS_OFFSCREENPLAIN
'建立角色位图平面
Set SpriteSurf = objDraw.CreateSurfaceFromFile(App.Path + "\sprite.bmp", ddsd5)
Dim key As DDCOLORKEY
'设定透明色(在这里设定为0,黑色)
key.low = 0
key.high = 0
SpriteSurf.SetColorKey DDCKEY_SRCBLT, key
sx = 20: sy = 20
lastTime = objDx.TickCount
While True
DoEvents
Blt
Wend
ErrHandler:
Select Case Err.Number
Case 0 ''No Errors
Case Else '错误退出
Call Cleanup
End Select
End Sub
Sub Blt()
Dim mrectScreen As RECT
Dim sTimePass As Single
Dim sFramePerS As Single
'以黑色清除并填充后台绘图平面
BackSurf.BltColorFill mrectScreen, 0
'获得背景位图平面的矩形区域的尺寸
mrectScreen.Right = ddsd2.lWidth
mrectScreen.Bottom = ddsd2.lHeight
'将图形绘图平面中的内容复制到后台绘图平面上
Call BackSurf.BltFast(0, 0, BmpSurf, mrectScreen, DDBLTFAST_WAIT)
'获得前景角色位图平面的矩形区域
mrectScreen.Right = ddsd5.lWidth
mrectScreen.Bottom = ddsd5.lHeight
'将前景角色位图复制到后台绘图平面上。
Call BackSurf.BltFast(sx, sy, SpriteSurf, mrectScreen, DDBLTFAST_SRCCOLORKEY)
sx = sx + 2: sy = sy + 2
If sx > 400 Then sx = 20
If sy > 400 Then sy = 20
'在后台绘图平面上输出文本
BackSurf.DrawText 30, 30, "This is my first DirectX program", False
BackSurf.DrawText 30, 60, "点击屏幕退出程序", False
'获得每秒的播放帧数。
FrameCount = FrameCount + 1
sTimePass = (objDx.TickCount - lastTime) / 1000
If sTimePass > 0.5 Then
sFramePerS = FrameCount / sTimePass
End If
BackSurf.DrawText 30, 90, "每秒帧数:" + Format$(sFramePerS, "##00.0"), False
'将后台绘图平面上的内容翻转到前台来
MainSurf.Flip Nothing, DDFLIP_WAIT
End Sub
Private Function SetNewDisplayMode()
On Error GoTo ErrHandler
Dim i As Long
i = List1.ListIndex
If i = -1 Then
MsgBox "请在列表中选择一种显示模式", vbOKOnly, "错误"
Exit Function
End If
'获得用户选择的显示模式
objEnumModes.GetItem (i + 1), ddsd
''设置协作模式
objDraw.SetCooperativeLevel Me.hWnd, DDSCL_FULLSCREEN Or DDSCL_ALLOWMODEX _
Or DDSCL_EXCLUSIVE
''设置显示模式
objDraw.SetDisplayMode ddsd.lWidth, ddsd.lHeight, ddsd.ddpfPixelFormat.lRGBBitCount, _
0, DDSDM_DEFAULT
Me.Refresh
ErrHandler:
Select Case Err.Number
Case 0 ''No Errors
Case Else
Err.Raise Err.Number, Err.Source, Err.Description, Err.HelpContext, _
Err.HelpContext
Call Cleanup
End Select
End Function
Sub Cleanup() 'Cleanup函数回复屏幕并且清除DirectX对象
Call objDraw.RestoreDisplayMode
Call objDraw.SetCooperativeLevel(Me.hWnd, DDSCL_NORMAL)
Set objDraw = Nothing
Set objDx = Nothing
End
End Sub
Private Sub Command1_Click()
End
End Sub
Private Sub Command2_Click()
Dim i
For i = 0 To Form1.Controls.Count - 1
Form1.Controls(i).Visible = False
Next i
SetNewDisplayMode
InitSurf
End Sub
Private Sub Form_Click()
Cleanup
End Sub
Private Sub Form_Load()
Command1.Caption = "结束"
Command2.Caption = "设置显示模式"
On Error GoTo ErrHandler:
Dim ddsd As DDSURFACEDESC2
Dim i As Long, lgCount As Long
Set objDx = New DirectX7
'建立 DirectDraw 对象
Set objDraw = objDx.DirectDrawCreate("")
'将DirectDraw对象支持的显示模式设置到DirectDrawEnumModes对象中
Set objEnumModes = objDraw.GetDisplayModesEnum(DDEDM_DEFAULT, ddsd)
'将数据设置到ListBox中
lgCount = objEnumModes.GetCount()
For i = 1 To lgCount
objEnumModes.GetItem i, ddsd
List1.AddItem CStr(ddsd.lWidth) & "x" & CStr(ddsd.lHeight) & "x" _
& CStr(ddsd.ddpfPixelFormat.lRGBBitCount)
Next i
ErrHandler:
Select Case Err.Number
Case 0 ''没有错误
Case Else
Err.Raise Err.Number, Err.Source, Err.Description, Err.HelpContext, _
Err.HelpContext
Call Cleanup
End Select
End Sub
现在程序全部完成了,运行程序,点击列表中的任意显示模式,然后点击"设置显示模式"按钮,可以看到位图被显示在屏幕上并且在屏幕上显示出程序中的文本。
上面的程序比较简单,但是包含了基本的DirectDraw的应用,下面来分析一下:
首先通过DirectX7的DirectDrawCreate方法建立一个DirectDraw对象,然后通过GetDisplayModesEnum方法获得DirectDraw对象支持的显示模式,当选择某一种显示模式之后,调用DirectDraw对象的SetDisplayMode方法设置所选择的显示模式。
接下来是设置绘图平面,如果对于游戏编程有一些了解的朋友都会知道,为了不使在游戏的图像切换时发生闪烁,我们一般需要设置一个后台绘图平面,对所有的画面首先在后台缓冲平面上做所需要的处理,然后再将它翻转到前台来。从上面的程序可以看到,在程序中一共设置了三个不同的绘图平面:MainSurf、BackSurf、BmpSurf、SpriteSurf。MainSurf是主绘图平面,是程序运行时可以看到的部分;而BackSurf是后台绘图平面;BmpSurf是背景位图平面;SpriteSurf是角色位图平面。我们使用MainSurf的GetAttachedSurface方法将BackSurf设置为MainSurf的附加平面,所有的图形操作首先在在BackSurf上进行,然后在翻转到主平面上来。BmpSurf在程序中利用DirectDraw的CreateSurfaceFromFile函数被设置为一个包含位图的绘图平面。SpriteSurf也做同样的设定,但是为了使只有角色显示出来而无关的部分不显示,我们需要设置SpriteSurf的ColorKey,在上面设置为0黑色,即在粘贴图像时Sprite.bmp 中的黑色部分不会显示出来。然后建立一个无限循环,在每个循环内首先将BmpSurf上的位图转贴到BackSurf上,然后在BackSurf上输出文字,等在BackSurf上的操作全部完成之后,再利用MainSurf的Flip方法将后台绘图平面的内容翻转到前台平面上来。读者需要注意的是这四个绘图平面的不同属性(从ddsd1到ddsd5)。
二、 Direct3D
Direct3D类对象可以说是DirectX下最重要的同时也是最复杂的对象集合。基本说来,Direct3D可以分为立即模式( Immediate Mode)和保留模式(Retained Mode)。其中保留模式是一种高级3D API编程接口,它是为需要快速开发Direct 3D应用的程序员所准备的。而立即模式是一种低级3D API编程接口,它为需要开发高性能游戏或者多媒体应用的程序员提供了在较低级别上同图形加速硬件打交道的与设备无关的接口。Direct3D的保留模式是建立在立即模式基础之上的,如下图所示:
由上面的图可以看到。Direct3D的立即模式同图形加速硬件之间的结合比较紧密,性能比较高,适合于开发三维游戏。而Direct3D的保留模式具有层次性,可移植性比较的好,可以用于开发商业的三维应用程序(例如设备展示等)。
要建立一个Direct3D应用,首先要建立Direct3D7对象,利用DirectDraw7对象的GetDirect3D方法可以获得一个Direct3D7对象。利用Direct3D7对象可以建立Direct3D对象以及设置三维环境。
利用Direct3D7对象的CreateDevice方法可以建立一个Direct3DDevive7对象,你可以将一个Direct3DDevice7对象想象为一个电影场景,你可以向场景中布置演员(3D对象)、给每个演员安排服装(纹理设置)、设置灯光(光照效果)、设置摄影机(设置视角)。
下面通过一个具体的程序来说明Direct3D立即模式的基本原理
首先建立一个新的工程并保存,为了给三维对象加上纹理,我们需要在工程目录下建立三个位图文件,文件名分别是t1.bmp、t2.bmp、t3.bmp,位图的尺寸要设置为128*128或者256*256像素,将DirectX7 说明库加入到工程文件中。然后在Form1中加入以下代码:
Option Explicit
Const pi As Single = 3.141592
Const NUM_CUBE_VERTICES As Integer = 4 * 6
Dim g_vCube(NUM_CUBE_VERTICES) As D3DVERTEX
'定义三个材质表面
Dim TextureSurface1 As DirectDrawSurface7
Dim TextureSurface2 As DirectDrawSurface7
Dim TextureSurface3 As DirectDrawSurface7
Dim g_dx As New DirectX7
Dim g_dd As DirectDraw7
Dim g_ddsd As DDSURFACEDESC2
Dim MainBuffer As DirectDrawSurface7
Dim BackBuffer As DirectDrawSurface7
Dim Direct3DDevice As Direct3DDevice7
Dim g_rcDest As RECT, g_rcSrc As RECT
Dim ViewPortRect(0) As D3DRECT
Dim bIsRunning As Boolean
Dim bRoAn As Boolean
Dim CNT As Single
Dim iViewSize As Integer
Private Sub Form_KeyDown(KeyCode As Integer, Shift As Integer)
'根据不同的击键值来决定角度的变化
Select Case KeyCode
Case vbKeyUp
CNT = CNT + 6
bRoAn = True
Case vbKeyDown
CNT = CNT - 6
bRoAn = True
Case vbKeyLeft
CNT = CNT + 6
bRoAn = False
Case vbKeyRight
CNT = CNT - 6
bRoAn = False
Case vbKeySubtract
If iViewSize < 12 Then
iViewSize = iViewSize + 1
End If
Case vbKeyAdd
If iViewSize > 4 Then
iViewSize = iViewSize - 1
End If
End Select
End Sub
Private Sub Form_Load()
Dim j As Long
InitDDraw
InitD3D
InitDeviceObjects
Me.Show
bIsRunning = True
Do While bIsRunning = True
RenderScene
FrameMove (CNT / 360), bRoAn
g_dx.GetWindowRect Me.hWnd, g_rcDest
'将后台绘图平面的内容复制到前台
j = MainBuffer.Blt(g_rcDest, BackBuffer, g_rcSrc, DDBLT_WAIT)
If j <> DD_OK Then
MsgBox "无法将后台绘图平面的内容拷贝到前台,错误代码:" & Hex(j)
End
End If
DoEvents
Loop
End Sub
Private Sub FrameMove(stepVal As Single, bType As Boolean)
Dim matView As D3DMATRIX
Dim matTemp As D3DMATRIX
'建立线形矩阵
g_dx.IdentityMatrix matView
' matView.rc11 = Cos(0.5)
' matView.rc12 = Sin(0.5)
' matView.rc21 = Sin(-0.5)
' matView.rc22 = Cos(0.5)
' matView.rc33 = 1
' matView.rc43 = iviewsize
'你可以尝试将下面5句注释掉而使用上面5句进行视矩阵变换,看有什么效果
matView.rc11 = 1
matView.rc22 = Cos(-0.5)
matView.rc23 = Sin(-0.5)
matView.rc32 = -Sin(-0.5)
matView.rc33 = Cos(-0.5)
matView.rc43 = iViewSize
'对视矩阵进行角度变换
Direct3DDevice.SetTransform D3DTRANSFORMSTATE_VIEW, matView
Dim matWorld As D3DMATRIX
g_dx.IdentityMatrix matWorld
If bType Then
g_dx.RotateXMatrix matWorld, stepVal
Else
g_dx.RotateYMatrix matWorld, stepVal
End If
Direct3DDevice.SetTransform D3DTRANSFORMSTATE_WORLD, matWorld
End Sub
'RenderScene函数执行场景重绘和渲染
Private Sub RenderScene()
Dim i As Integer
'将整个视界背景设置为蓝色,并清除Z缓冲
Direct3DDevice.Clear 1, ViewPortRect(), D3DCLEAR_TARGET, &HFF, 1, 0
'开始绘制场景
Direct3DDevice.BeginScene
'将TextureSurface1设置为Direct3DDevice的纹理平面
Direct3DDevice.SetTexture 0, TextureSurface1
'使用TextureSurface1作为纹理绘制g_vCube(0)到g_vCube(3)顶点之间的平面,
Call Direct3DDevice.DrawPrimitive(D3DPT_TRIANGLESTRIP, D3DFVF_VERTEX, g_vCube(0), _
4, D3DDP_DEFAULT)
'使用TextureSurface1作为纹理绘制g_vCube(4)到g_vCube(7)顶点之间的平面,
Call Direct3DDevice.DrawPrimitive(D3DPT_TRIANGLESTRIP, D3DFVF_VERTEX, g_vCube(4), _
4, D3DDP_DEFAULT)
'将TextureSurface2设置为Direct3DDevice的纹理平面
Direct3DDevice.SetTexture 0, TextureSurface2
'使用TextureSurface2作为纹理绘制g_vCube(8)到g_vCube(11)顶点之间的平面,
Call Direct3DDevice.DrawPrimitive(D3DPT_TRIANGLESTRIP, D3DFVF_VERTEX, g_vCube(8), _
4, D3DDP_DEFAULT)
'使用TextureSurface2作为纹理绘制g_vCube(12)到g_vCube(15)顶点之间的平面,
Call Direct3DDevice.DrawPrimitive(D3DPT_TRIANGLESTRIP, D3DFVF_VERTEX, g_vCube(12), _
4, D3DDP_DEFAULT)
'将TextureSurface3设置为Direct3DDevice的纹理平面
Direct3DDevice.SetTexture 0, TextureSurface3
'使用TextureSurface3作为纹理绘制g_vCube(16)到g_vCube(19)顶点之间的平面,
Call Direct3DDevice.DrawPrimitive(D3DPT_TRIANGLESTRIP, D3DFVF_VERTEX, g_vCube(16), _
4, D3DDP_DEFAULT)
'使用TextureSurface3作为纹理绘制g_vCube(20)到g_vCube(23)顶点之间的平面,
Call Direct3DDevice.DrawPrimitive(D3DPT_TRIANGLESTRIP, D3DFVF_VERTEX, g_vCube(20), _
4, D3DDP_DEFAULT)
'结束绘制场景
Direct3DDevice.EndScene
End Sub
Private Sub Form_Unload(Cancel As Integer)
bIsRunning = False
End Sub
'InitDDraw函数初始化DirectDraw对象,包括建立主绘图平面以及后台绘图平面
Private Sub InitDDraw()
'建立DirectDraw对象
Set g_dd = g_dx.DirectDrawCreate("")
'设定DirectDraw对象的协作模式
g_dd.SetCooperativeLevel Me.hWnd, DDSCL_NORMAL
'预先定义主绘图平面的属性
g_ddsd.lFlags = DDSD_CAPS
g_ddsd.ddsCaps.lCaps = DDSCAPS_PRIMARYSURFACE
'建立主绘图平面
Set MainBuffer = g_dd.CreateSurface(g_ddsd)
g_ddsd.lFlags = DDSD_HEIGHT Or DDSD_WIDTH Or DDSD_CAPS
g_ddsd.ddsCaps.lCaps = DDSCAPS_OFFSCREENPLAIN Or DDSCAPS_3DDEVICE
g_dx.GetWindowRect Me.hWnd, g_rcDest
g_ddsd.lWidth = g_rcDest.Right - g_rcDest.Left
g_ddsd.lHeight = g_rcDest.Bottom - g_rcDest.Top
'建立后台绘图平面
Set BackBuffer = g_dd.CreateSurface(g_ddsd)
'将后台绘图平面的尺寸保存到g_rcSrc中
With g_rcSrc
.Left = 0: .Top = 0
.Bottom = g_ddsd.lHeight
.Right = g_ddsd.lWidth
End With
Dim pcClipper As DirectDrawClipper
Set pcClipper = g_dd.CreateClipper(0)
pcClipper.SetHWnd Me.hWnd
MainBuffer.SetClipper pcClipper
End Sub
'InitD3D函数初始化Direct3D对象,包括3D设备、光源、视角以及材质
Sub InitD3D()
Dim d3d As Direct3D7
Dim ddsd As DDSURFACEDESC2
'从DirectDraw对象中获得Direct3D对象
Set d3d = g_dd.GetDirect3D
'获得DirectDraw对象的显示颜色深度,如果小于16位色,则程序出错退出
g_dd.GetDisplayMode ddsd
If ddsd.ddpfPixelFormat.lRGBBitCount <= 8 Then
MsgBox "本程序不支持颜色位数小于16bit的显示模式,程序将退出"
End
End If
On Error Resume Next
'首先尝试建立硬件3维设备对象(HAL)
Set Direct3DDevice = d3d.CreateDevice("IID_IDirect3DHALDevice", BackBuffer)
'如果Direct3DDevice为Nothing说明显示卡不支持硬件Direct3D设备
'尝试建立RGB3维设备。
If Direct3DDevice Is Nothing Then
Set Direct3DDevice = d3d.CreateDevice("IID_IDirect3DRGBDevice", BackBuffer)
End If
'定义视角区域
Dim VPDesc As D3DVIEWPORT7
VPDesc.lWidth = g_rcDest.Right - g_rcDest.Left
VPDesc.lHeight = g_rcDest.Bottom - g_rcDest.Top
VPDesc.minz = 0#
VPDesc.maxz = 1#
'设置Direct3DDevice对象的视角
Direct3DDevice.SetViewport VPDesc
'保存对视角的设置
With ViewPortRect(0)
.X1 = 0: .Y1 = 0
.X2 = VPDesc.lWidth
.Y2 = VPDesc.lHeight
End With
iViewSize = 4
End Sub
'InitDeviceObjects函数建立三维物体
Private Sub InitDeviceObjects()
'建立立方体的顶点数据
CreateCube g_vCube
'通过位图文件建立三个纹理表面
Set TextureSurface1 = CreateTextureSurface("t1.bmp")
Set TextureSurface2 = CreateTextureSurface("t2.bmp")
Set TextureSurface3 = CreateTextureSurface("t3.bmp")
'使用泛光源以及白色的普通材质
Dim mtrl As D3DMATERIAL7
'定义材质对光源的的反射属性,你可以尝试改变它们的值看一下材质
'的反射效果
mtrl.diffuse.r = 1#: mtrl.diffuse.g = 0#: mtrl.diffuse.b = 1#
mtrl.Ambient.r = 1#: mtrl.Ambient.g = 1#: mtrl.Ambient.b = 1#: mtrl.Ambient.a = 1
mtrl.emissive.r = 1#: mtrl.emissive.g = 0#: mtrl.emissive.b = 1#
mtrl.emissive.r = 1#: mtrl.specular.g = 1#: mtrl.specular.b = 1#
'将材质的清晰度设置为10
mtrl.power = 10
Direct3DDevice.SetMaterial mtrl
'设置Direct3DDevice的光源为泛光源,你可以尝试对SetRenderState函数的
'第一个参数使用不同的值,看看光源的效果。
Direct3DDevice.SetRenderState D3DRENDERSTATE_AMBIENT, _
g_dx.CreateColorRGBA(1#, 1#, 0#, 1#)
Dim matProj As D3DMATRIX
g_dx.IdentityMatrix matProj
Call g_dx.ProjectionMatrix(matProj, 1, 1000, pi / 4#)
Direct3DDevice.SetTransform D3DTRANSFORMSTATE_PROJECTION, matProj
End Sub
'CreateCube函数建立立方体的顶点数据
Private Sub CreateCube(vertices() As D3DVERTEX)
'一个立方体有6个面,每面有是一个正方形,有4个顶点,下面共定义了
'这6个面的24个顶点
g_dx.CreateD3DVertex -1, 1, -1, 0, 0, -1, 0, 0, vertices(0)
g_dx.CreateD3DVertex 1, 1, -1, 0, 0, -1, 1, 0, vertices(1)
g_dx.CreateD3DVertex -1, -1, -1, 0, 0, -1, 0, 1, vertices(2)
g_dx.CreateD3DVertex 1, -1, -1, 0, 0, -1, 1, 1, vertices(3)
g_dx.CreateD3DVertex -1, 1, 1, 0, 0, 1, 1, 0, vertices(4)
g_dx.CreateD3DVertex -1, -1, 1, 0, 0, 1, 1, 1, vertices(5)
g_dx.CreateD3DVertex 1, 1, 1, 0, 0, 1, 0, 0, vertices(6)
g_dx.CreateD3DVertex 1, -1, 1, 0, 0, 1, 0, 1, vertices(7)
g_dx.CreateD3DVertex -1, 1, 1, 0, 1, 0, 0, 0, vertices(8)
g_dx.CreateD3DVertex 1, 1, 1, 0, 1, 0, 1, 0, vertices(9)
g_dx.CreateD3DVertex -1, 1, -1, 0, 1, 0, 0, 1, vertices(10)
g_dx.CreateD3DVertex 1, 1, -1, 0, 1, 0, 1, 1, vertices(11)
g_dx.CreateD3DVertex -1, -1, 1, 0, -1, 0, 0, 0, vertices(12)
g_dx.CreateD3DVertex -1, -1, -1, 0, -1, 0, 0, 1, vertices(13)
g_dx.CreateD3DVertex 1, -1, 1, 0, -1, 0, 1, 0, vertices(14)
g_dx.CreateD3DVertex 1, -1, -1, 0, -1, 0, 1, 1, vertices(15)
g_dx.CreateD3DVertex 1, 1, -1, 1, 0, 0, 0, 0, vertices(16)
g_dx.CreateD3DVertex 1, 1, 1, 1, 0, 0, 1, 0, vertices(17)
g_dx.CreateD3DVertex 1, -1, -1, 1, 0, 0, 0, 1, vertices(18)
g_dx.CreateD3DVertex 1, -1, 1, 1, 0, 0, 1, 1, vertices(19)
g_dx.CreateD3DVertex -1, 1, -1, -1, 0, 0, 1, 0, vertices(20)
g_dx.CreateD3DVertex -1, -1, -1, -1, 0, 0, 1, 1, vertices(21)
g_dx.CreateD3DVertex -1, 1, 1, -1, 0, 0, 0, 0, vertices(22)
g_dx.CreateD3DVertex -1, -1, 1, -1, 0, 0, 0, 1, vertices(23)
End Sub
Public Function CreateTextureSurface(sFile As String) As DirectDrawSurface7
Dim ddsTexture As DirectDrawSurface7
Dim i As Long
Dim bIsFound As Boolean
Dim ddsd As DDSURFACEDESC2
'定义纹理平面的属性
ddsd.lFlags = DDSD_CAPS Or DDSD_HEIGHT Or DDSD_WIDTH Or DDSD_PIXELFORMAT _
Or DDSD_TEXTURESTAGE
Dim TextureEnum As Direct3DEnumPixelFormats
'获得当前Direct3DDevice支持的所有纹理类型
Set TextureEnum = Direct3DDevice.GetTextureFormatsEnum()
'便历所有纹理类型,找到符合需要的类型
For i = 1 To TextureEnum.GetCount()
bIsFound = True
Call TextureEnum.GetItem(i, ddsd.ddpfPixelFormat)
With ddsd.ddpfPixelFormat
'跳过不常使用的格式
If .lFlags And (DDPF_LUMINANCE Or DDPF_BUMPLUMINANCE Or DDPF_BUMPDUDV) Then
bIsFound = False
End If
'跳过FourCC格式
If .lFourCC <> 0 Then bIsFound = False
'跳过Alpha模式纹理
If .lFlags And DDPF_ALPHAPIXELS Then bIsFound = False
'只使用16位颜色三维纹理,跳过其它的颜色设定
If .lRGBBitCount <> 16 Then bIsFound = False
End With
If bIsFound Then Exit For
Next i
If Not bIsFound Then
MsgBox "你的图形卡不支持16位颜色绘图平面"
End
End If
ddsd.ddsCaps.lCaps = DDSCAPS_TEXTURE
ddsd.ddsCaps.lCaps2 = DDSCAPS2_TEXTUREMANAGE
ddsd.lTextureStage = 0
sFile = App.Path + "\" + sFile
'建立一个新的纹理绘图平面
Set ddsTexture = g_dd.CreateSurfaceFromFile(sFile, ddsd)
'返回建立的纹理绘图平面
Set CreateTextureSurface = ddsTexture
End Function
运行程序,在窗口中会出现一个带贴图的立方体,按动上下左右方向键就可以向不同的方向滚动立方体,按动+、-键可以缩放立方体。
分析上面的程序,基本的实现过程大家可能已经有一些基本的了解,首先建立DirectX7对象,然后建立并初始化DirectDraw、再建立Direct3D对象。接下来利用CreateCube函数建立立方体框架,利用InitDeviceObjects函数为Direct3DDevice对象建立纹理、光照效果以及材质,利用RenderScene函数可以将不同的纹理赋予立方体不同的表面并将其绘制在DirectDrawSurface7对象。对于FrameMove函数中的内容可能大家不太了解。在Direct3D场景中有两个不同的坐标系,一个是以Direct3D场景的中心为坐标原点的坐标系,另外一个是以虚拟的观察者为中心的坐标系。在Direct3D世界中的对象的旋转、平移是通过改变对象的坐标系来实现的,D3DMATRIX对象定义了一个4*4的矩阵,Direct3D场景中的某一点到另外一点的变换是使用如下公式来进行的:
展开如下:
其中x'、y'、z'为新坐标。FrameMove函数中的SetTransform方法就是根据D3DMATRIX对象定义的4*4的矩阵进行坐标系变换的函数。另外作者还编写了一个平移对象的FrameMove函数,函数如下:
Private Sub FrameMove(stepVal As Single, bType As Boolean)
Dim matView As D3DMATRIX
Dim matWorld As D3DMATRIX
'建立线形矩阵
g_dx.IdentityMatrix matView
matView.rc11 = 1
matView.rc22 = Cos(-0.5)
matView.rc23 = Sin(-0.5)
matView.rc32 = -Sin(-0.5)
matView.rc33 = Cos(-0.5)
matView.rc43 = iViewSize
If bType Then
g_dx.RotateXMatrix matView, stepVal
Else
g_dx.RotateYMatrix matView, stepVal
End If
Direct3DDevice.SetTransform D3DTRANSFORMSTATE_VIEW, matView
g_dx.IdentityMatrix matWorld
matWorld.rc11 = 1
matWorld.rc22 = Cos(-0.5)
matWorld.rc23 = Sin(-0.5)
matWorld.rc32 = -Sin(-0.5)
matWorld.rc33 = Cos(-0.5)
matWorld.rc43 = iViewSize
Direct3DDevice.SetTransform D3DTRANSFORMSTATE_WORLD, matWorld
End Sub
你可以将这个函数代入上面的程序运行,程序运行时首先按-键将立方体缩小,然后按动上下左右键看立方体是如何平移的。
接下来介绍Direct3D保留模式对象编程,由于Direct3D保留模式对象比较多而且相对立即模式使用起来比较简单,我们就来直接切入程序。
建立一个新的工程文件,保存文件,为了添加纹理,你需要在工程文件所在目录下建立一个名字为glass.bmp 的位图文件。加入DirectX7说明库,然后在Form1的代码窗口中假如以下代码:
Option Explicit
Dim g_dx As New DirectX7
Dim g_dd As DirectDraw4
Dim pcClipper As DirectDrawClipper
Dim g_ddsd As DDSURFACEDESC2
Dim MainBuffer As DirectDrawSurface4
Dim BackBuffer As DirectDrawSurface4
'Direct3DRM对象
Dim D3DRM As Direct3DRM3
'三维设备对象
Dim RMDevice As Direct3DRMDevice3
'三维视区对象
Dim RMViewPort As Direct3DRMViewport2
'三维场景对象
Dim RMFrameScene As Direct3DRMFrame3
Dim RMFrameCamera As Direct3DRMFrame3
Dim RMFrameDirLight As Direct3DRMFrame3
Dim RMFrameAmbientLight As Direct3DRMFrame3
'光源对象
Dim RMDirLight As Direct3DRMLight
Dim RMAmbientLight As Direct3DRMLight
'Direct3DRMMeshBuilder3对象是提供与mesh对象象交互作用的对象
'一个mesh对象是一个由多个多边形组成德多面体
Dim meshbox As Direct3DRMMeshBuilder3
Dim framebox As Direct3DRMFrame3
Dim g_rcDest As RECT, g_rcSrc As RECT
Sub CleanUp()
Err.Clear
On Local Error Resume Next
Set RMFrameCamera = Nothing
Set RMFrameScene = Nothing
Set RMFrameDirLight = Nothing
Set RMFrameAmbientLight = Nothing
Set RMDirLight = Nothing
Set RMAmbientLight = Nothing
g_dd.RestoreDisplayMode
g_dd.SetCooperativeLevel Me.hWnd, DDSCL_NORMAL
Set BackBuffer = Nothing
Set MainBuffer = Nothing
Set g_dd = Nothing
Set RMViewPort = Nothing
Set RMDevice = Nothing
End Sub
Private Sub InitDDraw()
Set RMViewPort = Nothing
Set RMDevice = Nothing
'建立DirectDraw对象
Set g_dd = g_dx.DirectDraw4Create("")
'设定DirectDraw对象的协作模式
g_dd.SetCooperativeLevel Me.hWnd, DDSCL_NORMAL
'预先定义主绘图平面的属性
g_ddsd.lFlags = DDSD_CAPS
g_ddsd.ddsCaps.lCaps = DDSCAPS_PRIMARYSURFACE
'建立主绘图平面
Set MainBuffer = g_dd.CreateSurface(g_ddsd)
Set pcClipper = g_dd.CreateClipper(0)
pcClipper.SetHWnd Me.hWnd
MainBuffer.SetClipper pcClipper
g_dx.GetWindowRect Me.hWnd, g_rcDest
g_ddsd.lFlags = DDSD_HEIGHT Or DDSD_WIDTH Or DDSD_CAPS
g_ddsd.ddsCaps.lCaps = DDSCAPS_OFFSCREENPLAIN Or DDSCAPS_3DDEVICE
g_dx.GetWindowRect Me.hWnd, g_rcDest
g_ddsd.lWidth = g_rcDest.Right - g_rcDest.Left
g_ddsd.lHeight = g_rcDest.Bottom - g_rcDest.Top
'建立后台绘图平面
Set BackBuffer = g_dd.CreateSurface(g_ddsd)
End Sub
'InitS函数设定三维场景
Sub InitS()
Set D3DRM = g_dx.Direct3DRMCreate
'建立三维场景
Set RMFrameScene = D3DRM.CreateFrame(Nothing)
'建立相机
Set RMFrameCamera = D3DRM.CreateFrame(RMFrameScene)
'设置相机位置
RMFrameCamera.SetPosition Nothing, 0, 0, -10
'建立方向光源以及设置亮度
Set RMFrameDirLight = D3DRM.CreateFrame(RMFrameScene)
Set RMDirLight = D3DRM.CreateLightRGB(D3DRMLIGHT_DIRECTIONAL, 1, 1, 1)
'建立环境光源,环境光源的亮度只有方向光源的1/5
Set RMAmbientLight = D3DRM.CreateLightRGB(D3DRMLIGHT_AMBIENT, 0.2, 0.2, 0.2)
'将光源添加到三维场景中
RMFrameDirLight.AddLight RMDirLight
RMFrameScene.AddLight RMAmbientLight
'设置光源位置
RMFrameDirLight.SetPosition Nothing, 5, 5, -5
RMFrameDirLight.LookAt RMFrameScene, Nothing, 0
End Sub
'InitD3DRM函数设定三维设备和视区
Sub InitD3dRM()
Dim f As Direct3DRMFace2
Dim ddsd As DDSURFACEDESC2
Dim r As RECT
Dim D3DTexture As Direct3DRMTexture3
'获得窗口矩形区域
Call g_dx.GetWindowRect(Me.hWnd, r)
ddsd.lWidth = r.Right - r.Left
ddsd.lHeight = r.Bottom - r.Top
ddsd.lFlags = DDSD_CAPS Or DDSD_HEIGHT Or DDSD_WIDTH
ddsd.ddsCaps.lCaps = DDSCAPS_OFFSCREENPLAIN Or DDSCAPS_3DDEVICE Or _
DDSCAPS_SYSTEMMEMORY
'在后台绘图平面的基础上建立D3dRMDevice
Set RMDevice = D3DRM.CreateDeviceFromSurface("IID_IDirect3DRGBDevice", _
g_dd, BackBuffer, 0)
'三维设备接管窗口的绘制
RMDevice.HandleActivate 0
RMDevice.HandlePaint Me.hWnd
'建立视区,视区的范围为窗口的范围
Set RMViewPort = D3DRM.CreateViewport(RMDevice, RMFrameCamera, 0, 0, _
ddsd.lWidth, ddsd.lHeight)
'建立高路德渲染
RMDevice.SetQuality D3DRMRENDER_GOURAUD
'建立子场景
Set framebox = D3DRM.CreateFrame(RMFrameScene)
Set meshbox = D3DRM.CreateMeshBuilder
Set D3DTexture = D3DRM.LoadTexture(App.Path + "\glass.bmp")
'为meshbox建立六个平面并设置纹理
Set f = D3DRM.CreateFace()
f.AddVertex 2, 2, -2
f.AddVertex 2, -2, -2
f.AddVertex -2, -2, -2
f.AddVertex -2, 2, -2
f.SetTextureCoordinates 0, 0, 0
f.SetTextureCoordinates 1, 0, 4
f.SetTextureCoordinates 2, 4, 4
f.SetTextureCoordinates 3, 4, 0
f.SetTexture D3DTexture
meshbox.AddFace f
Set f = Nothing
Set f = D3DRM.CreateFace()
f.AddVertex -2, 2, 2
f.AddVertex -2, -2, 2
f.AddVertex 2, -2, 2
f.AddVertex 2, 2, 2
f.SetTextureCoordinates 0, 0, 0
f.SetTextureCoordinates 1, 0, 4
f.SetTextureCoordinates 2, 4, 4
f.SetTextureCoordinates 3, 4, 0
f.SetTexture D3DTexture
meshbox.AddFace f
Set f = Nothing
Set f = D3DRM.CreateFace()
f.AddVertex 2, 2, 2
f.AddVertex 2, -2, 2
f.AddVertex 2, -2, -2
f.AddVertex 2, 2, -2
f.SetTextureCoordinates 0, 0, 0
f.SetTextureCoordinates 1, 0, 4
f.SetTextureCoordinates 2, 4, 4
f.SetTextureCoordinates 3, 4, 0
f.SetTexture D3DTexture
meshbox.AddFace f
Set f = Nothing
Set f = D3DRM.CreateFace()
f.AddVertex -2, -2, 2
f.AddVertex -2, 2, 2
f.AddVertex -2, 2, -2
f.AddVertex -2, -2, -2
f.SetTextureCoordinates 0, 0, 0
f.SetTextureCoordinates 1, 0, 4
f.SetTextureCoordinates 2, 4, 4
f.SetTextureCoordinates 3, 4, 0
f.SetTexture D3DTexture
meshbox.AddFace f
Set f = Nothing
Set f = D3DRM.CreateFace()
f.AddVertex 2, 2, -2
f.AddVertex -2, 2, -2
f.AddVertex -2, 2, 2
f.AddVertex 2, 2, 2
f.SetTextureCoordinates 0, 0, 0
f.SetTextureCoordinates 1, 0, 4
f.SetTextureCoordinates 2, 4, 4
f.SetTextureCoordinates 3, 4, 0
f.SetTexture D3DTexture
meshbox.AddFace f
Set f = Nothing
Set f = D3DRM.CreateFace()
f.AddVertex 2, -2, 2
f.AddVertex -2, -2, 2
f.AddVertex -2, -2, -2
f.AddVertex 2, -2, -2
f.SetTextureCoordinates 0, 0, 0
f.SetTextureCoordinates 1, 0, 4
f.SetTextureCoordinates 2, 4, 4
f.SetTextureCoordinates 3, 4, 0
f.SetTexture D3DTexture
meshbox.AddFace f
Set f = Nothing
meshbox.SetName "Box"
Set f = D3DRM.CreateFace
meshbox.SetName "Color Box"
framebox.SetPosition Nothing, -5, 0, 10
framebox.SetRotation Nothing, 1, 1, 1, 0.05
'分别设置六个平面德颜色
meshbox.GetFace(0).SetColor g_dx.CreateColorRGB(1, 1, 0)
meshbox.GetFace(1).SetColor g_dx.CreateColorRGB(0, 1, 0)
meshbox.GetFace(2).SetColor g_dx.CreateColorRGB(0, 0, 1)
meshbox.GetFace(3).SetColor g_dx.CreateColorRGB(1, 1, 0)
meshbox.GetFace(4).SetColor g_dx.CreateColorRGB(0, 1, 1)
meshbox.GetFace(5).SetColor g_dx.CreateColorRGB(1, 1, 1)
'将立方体对象添加到场景中
framebox.AddVisual meshbox
End Sub
Private Sub Form_Load()
Dim rectMe As RECT
Dim rectEmpty As RECT
Me.Show
Me.ScaleMode = 3
InitS
InitDDraw
InitD3dRM
g_dx.GetWindowRect Me.hWnd, rectMe
While True
DoEvents
'清除视区内德内容
RMViewPort.Clear D3DRMCLEAR_ZBUFFER Or D3DRMCLEAR_TARGET
'重新渲染视区内的场景
RMViewPort.Render RMFrameScene
'更新三维设备
RMDevice.Update
'将后台绘图平面的内容翻转到前台来
Call MainBuffer.Blt(rectMe, BackBuffer, rectEmpty, DDBLT_WAIT)
Wend
End Sub
Private Sub Form_Unload(Cancel As Integer)
CleanUp
End
End Sub
运行程序,在窗口中就会出现一个立方体,可以看到,相对于使用立即模式,上面的保留模式就简单的多了。首先调用InitS函数建立场景、设置灯光以及相机,然后调用InitDDraw函数建立DirectDraw对象,最后调用InitD3dRM函数建立Direct3D对象以及设备并绘制三维立方体,设置立方体每面的颜色并添加到场景中(演员登场)。如果想让三维对象动起来,可以通过设置三维对象的位置、场景的角度以及相机的角度来分别实现。
三、 DirectInput
DirectInput是DirectX中的输入设备控件对象,它包括了对键盘、鼠标以及游戏杆的支持,使用DirectX的DirectInputCreate方法可以建立DirectInput对象,当建立一个DirectInput对象后,利用DirectInput对象的CreateDevice方法可以建立一个DirectInputDevice对象,使用DirectInputDevice对象可以获得对输入设备(键盘、鼠标、游戏杆)的控制。
下面通过一个简单的程序来了解DirectInput是如何工作的。首先建立一个新工程,加入Directx7说明库,在Form1中加入一个Timer控件和一个Label控件。然后在Form1中加入以下代码:
Option Explicit
Dim dx As New DirectX7
Dim di As DirectInput
Dim diDEV As DirectInputDevice
Dim diMouse As DirectInputDevice
Dim diState As DIKEYBOARDSTATE
Dim diSMouse As DIMOUSESTATE
Dim iKeyCounter As Integer
Dim ix, iy, iz
Private Sub Form_Load()
Set di = dx.DirectInputCreate()
If Err.Number <> 0 Then
MsgBox "Direct Input设置错误,请确认再你的系统中是否安装了DirectX", _
vbApplicationModal
End
End If
'建立一个键盘DirectInput对象
Set diDEV = di.CreateDevice("GUID_SysKeyboard")
Set diMouse = di.CreateDevice("GUID_SysMouse")
diDEV.SetCommonDataFormat DIFORMAT_KEYBOARD
diDEV.SetCooperativeLevel Me.hWnd, DISCL_BACKGROUND Or DISCL_NONEXCLUSIVE
diMouse.SetCommonDataFormat DIFORMAT_MOUSE
diMouse.SetCooperativeLevel Me.hWnd, DISCL_BACKGROUND Or DISCL_NONEXCLUSIVE
Me.Show
diDEV.Acquire
diMouse.Acquire
ix = diSMouse.x
iy = diSMouse.y
iz = diSMouse.z
Timer1.Interval = 10 '设置敲击键盘的灵敏度
Timer1.Enabled = True
End Sub
Private Sub Form_Unload(Cancel As Integer)
'程序结束后释放DirectInput对象
diDEV.Unacquire
diMouse.Unacquire
End Sub
Private Sub Timer1_Timer()
'获得当前的击键值
diDEV.GetDeviceStateKeyboard diState
For iKeyCounter = 0 To 255
'判断是否敲击了某键
If diState.Key(iKeyCounter) <> 0 Then
Label1.Caption = iKeyCounter & " - 击键时间为: (" & Time & ")"
End If
Next
diMouse.GetDeviceStateMouse diSMouse
If diSMouse.x <> 0 Then
ix = diSMouse.x
End If
If diSMouse.y <> 0 Then
iy = diSMouse.y
End If
If diSMouse.z <> 0 Then
iz = diSMouse.z
End If
Form1.Caption = "X:" & ix & " Y:" & iy & " Z:" & iz
DoEvents
End Sub
运行程序,敲击键盘的任意键,可以看到键值显示在了Label1上,而移动鼠标,当前鼠标坐标会显示在Form1的标题条上(光标的坐标原点是程序运行时光标所在的位置,而如果你的鼠标有滚轮的话,则Z坐标由你的滚轮的滚动所决定)。而不论窗口处于前台或者后台,击键和鼠标动作都会倍记录下来,你可以利用上面的程序稍加修改建立自己的鼠标键盘Hook程序。
四、 DirectSound
DirectSound类对象是DirectX中播放、捕捉数字声音对象并且对声音在虚拟的三维控件内进行定位。
它主要包括以下的几个对象:
DirectSound
DirectSoundBuffer
DirectSound3DBuffer
Direct3DsoundListner
DirectSoundCapture
DirectSoundCaptureBuffer
DirectSound对象和DirectSoundCapture对象是DirectSound类对象的基本对象,DirectSound对象是音频播放基本对象,而DirectSoundCapture对象是音频捕捉基本对象。利用DirectX7对象的DirectSoundCreate方法和DirectSoundCaptureCreate方法可以分别建立DirectSound对象和DirectSoundCapture对象。DirectSoundBuffer对象和DirectSound3Dbuffer是音频播放缓冲对象,顾名思义,前者是音频播放对象,而后者是三维音频播放对象。Direct3DSoundListner对象用于设置播放三维音频时收听者所处的位置。
下面通过一个程序来介绍DirectSound的应用,这个程序可以利用DirectSound3DBuffer播放文件并可以动态的设置声音位置。首先建立一个工程文件,在其中加入DirectX7说明库,然后在Form1中加入一个PictureBox控件和两个CommandButton控件。将Picture1的Width和Height属性都设置为3000。将Picture1的Scale属性设置为3-Pixel。保存工程文件,并在工程所在的目录下放置一个名为 Demo.wav 的声音文件。在Form1的代码窗口加入以下代码:
Dim m_dx As New DirectX7
Dim m_ds As DirectSound
Dim m_dsBuffer As DirectSoundBuffer
Dim m_ds3dBuffer As DirectSound3DBuffer
Dim m_dsPrimaryBuffer As DirectSoundBuffer
Dim m_dsListener As DirectSound3DListener
Dim m_pos As D3DVECTOR
Sub DrawPositions()
Dim X As Integer
Dim z As Integer
Picture1.Cls
'以黑色圈标出收听者所在的位置
Picture1.Circle (Picture1.ScaleWidth / 2, Picture1.ScaleHeight / 2), 4
'以红色圈标出声音所在的位置
X = CInt(m_pos.X) + Picture1.ScaleWidth / 2
z = CInt(m_pos.z) + Picture1.ScaleHeight / 2
Picture1.Circle (X, z), 4, RGB(255, 0, 0)
End Sub
Sub Load(sFile As String)
Dim bufferDesc1 As DSBUFFERDESC
Dim waveFormat1 As WAVEFORMATEX
'设置将建立的DirectSoundBuffer对象的属性
bufferDesc1.lFlags = (DSBCAPS_CTRL3D Or DSBCAPS_CTRLFREQUENCY Or _
DSBCAPS_CTRLPAN Or DSBCAPS_CTRLVOLUME) Or DSBCAPS_STATIC
'建立DirectSoundBuffer对象
Set m_dsBuffer = m_ds.CreateSoundBufferFromFile(sFile, bufferDesc1, _
waveFormat1)
'设置DirectSoundBuffer对象的声音(0为最大)
m_dsBuffer.SetVolume 0
'设置DirectSoundBuffer对象
Set m_ds3dBuffer = m_dsBuffer.GetDirectSound3DBuffer
'设置DirectSoundBuffer对象的播放方向属性
m_ds3dBuffer.SetConeOrientation 1, 1, 1, DS3D_IMMEDIATE
m_ds3dBuffer.SetConeAngles DS3D_MINCONEANGLE, 100, DS3D_IMMEDIATE
m_ds3dBuffer.SetConeOutsideVolume -100, DS3D_IMMEDIATE
'设置DirectSoundBuffer对象的播放位置属性
m_ds3dBuffer.SetPosition m_pos.X / 50, 0, m_pos.z / 50, DS3D_IMMEDIATE
End Sub
Sub UpdatePosition(X As Single, z As Single)
m_pos.X = X - Picture1.ScaleWidth / 2
m_pos.z = z - Picture1.ScaleHeight / 2
DrawPositions
If m_ds3dBuffer Is Nothing Then Exit Sub
'重新设置DirectSoundBuffer对象的播放位置属性
m_ds3dBuffer.SetPosition m_pos.X / 50, 0, m_pos.z / 50, DS3D_IMMEDIATE
End Sub
Private Sub Command1_Click()
If m_dsBuffer Is Nothing Then
Call Load(App.Path + "\demo.wav")
End If
'循环播放声音文件
m_dsBuffer.Play 1
End Sub
Private Sub Command2_Click()
If m_dsBuffer Is Nothing Then Exit Sub
m_dsBuffer.Stop
m_dsBuffer.SetCurrentPosition 0
End Sub
Private Sub Form_Load()
Dim i As Integer
Command1.Caption = "播放"
Command2.Caption = "停止"
Me.Show
DoEvents
On Local Error Resume Next
'建立DirectSound对象
Set m_ds = m_dx.DirectSoundCreate(vbNullString)
If Err.Number <> 0 Then
MsgBox "无法佳丽DirectSound对象,请查看声卡或驱动程序是否安装正确"
End
End If
'设置DirectSound对象的协作模式
m_ds.SetCooperativeLevel Me.hWnd, DSSCL_PRIORITY
Dim primDesc As DSBUFFERDESC, format As WAVEFORMATEX
primDesc.lFlags = DSBCAPS_CTRL3D Or DSBCAPS_PRIMARYBUFFER
'建立主声音缓冲对象
Set m_dsPrimaryBuffer = m_ds.CreateSoundBuffer(primDesc, format)
'建立DirectSound3DListener对象
Set m_dsListener = m_dsPrimaryBuffer.GetDirectSound3DListener()
m_pos.X = 10: m_pos.z = 50
UpdatePosition m_pos.X, m_pos.z
End Sub
Private Sub Picture1_MouseDown(Button As Integer, Shift As Integer, X As Single, Y As Single)
If Button = 1 Then
UpdatePosition X, Y
End If
End Sub
Private Sub Picture1_Paint()
DrawPositions
End Sub
运行程序,在PictureBox中回出现一个黑色和一个红色的小圆圈。黑色的代表虚拟的收听者的位置,红色的代表音源的位置。点击"播放"按钮即可以播放Demo.wav文件,你可以点击PictureBox中的不同位置来设置音源的位置,然后再听一下声音发生的改变,在本人的爱机上安装的只是普通双声道声卡,所以效果不是很明显,有高档多声道声卡的朋友可以使用上面的程序感受一下你的声卡的三维效果。
五、 DirectMusic
同DirectSound类对象不同,DirectMusic类对象负责控制对于音乐数据进行播放(象一个MIDI文件)。DirectMusic对象类主要包括以下对象:
DirectMusicLoader
DirectMusicPerformance
DirectMusicSegment
DirectMusicLoader对象负责装载音乐数据文件,利用DirectX7对象的
DirectMusicLoaderCreate方法可以建立一个DirectMusicLoader对象。
DirectMusicSegment对象描述了一个音乐片断
DirectMusicPerformance对象负责对音乐数据回放进行全面控制。它可以定位音乐数据输出通道、播放音乐片断、发送消息、处理事件、获取音乐数据的相关信息等。利用DirectX7的DirectMusicPerformanceCreate方法可以建立一个DirectMusicPerformance对象。
下面是一个具体的利用DirectMusic类对象播放音乐数据文件的范例程序。首先建立一个新的工程文件,加入DirectX7说明库,然后在Form1中加入4个CommandButton控件,3个Label控件,一个CommonDialog控件和一个Timer控件。然后在Form1德代码窗口中加入以下代码:
Option Explicit
Private Declare Sub Sleep Lib "kernel32" (ByVal lMilliseconds As Long)
Dim objDX As New DirectX7
Dim objDMLoader As DirectMusicLoader
Dim objDMPerf As DirectMusicPerformance
Dim objDMSeg As DirectMusicSegment
Dim objDMSegSt As DirectMusicSegmentState
Dim DTimesig As DMUS_TIMESIGNATURE
Dim portcaps As DMUS_PORTCAPS
Dim lTimePassed As Long
Dim lMTime As Long
Dim lTempo, GetStartTime, Offset As Long
Dim ElapsedTime2 As Long
Dim ElapsedTime, sAllTime As String
Dim fIsPaused As Boolean
Sub GetTimePassed()
Dim min As Integer
Dim a As Single
'首先确定objDMSegSt以及objDMPerf是否有效
If objDMSegSt Is Nothing Or objDMPerf Is Nothing Then
Exit Sub
End If
'处于播放状态
If objDMPerf.IsPlaying(Nothing, objDMSegSt) = True Then
'获得以秒计算的播放时间
ElapsedTime2 = ((((objDMPerf.GetMusicTime() - (objDMSegSt.GetStartTime() _
- Offset)) / 768) * 60) / lTempo)
'获得分钟
min = 0
a = ElapsedTime2 - 60
Do While a >= 0
min = min + 1
a = a - 60
Loop
ElapsedTime = Format(min, "00") & ":" & Format(Abs((ElapsedTime2 - (min * 60))), "00.0")
Else
If fIsPaused Then
Else
ElapsedTime = "00:00.0"
End If
End If
End Sub
Private Sub Command1_Click()
Set objDMLoader = Nothing
Set objDMLoader = objDX.DirectMusicLoaderCreate
CommonDialog1.Filter = "MIDI Files (*.mid)|*.mid" ' Set filters
CommonDialog1.InitDir = App.Path
CommonDialog1.ShowOpen
If Dir$(CommonDialog1.FileName) <> "" Then
Me.Caption = CommonDialog1.FileName
'读入MIDI文件
Set objDMSeg = objDMLoader.LoadSegment(CommonDialog1.FileName)
'获得MIDI文件的播放时间
lMTime = objDMPerf.GetMusicTime()
'播放一定程度的MIDI文件以获取文件信息
Call objDMPerf.PlaySegment(objDMSeg, 0, lMTime + 2000)
'获取MIDI播放速度
lTempo = objDMPerf.GetTempo(lMTime + 2000, 0)
Label2.Caption = "MIDI速度" + Format(lTempo, "00.00")
'获得MIDI节拍信息
Call objDMPerf.GetTimeSig(lMTime + 2000, 0, DTimesig)
Label3.Caption = "MIDI节拍" & DTimesig.beatsPerMeasure & "/" & DTimesig.beat
Dim a, Minutes, mtlength As Long
'获得MIDI播放长度
mtlength = (((objDMSeg.GetLength() / 768) * 60) / lTempo)
Minutes = 0
a = mtlength - 60
Do While a > 0
Minutes = Minutes + 1
a = a - 60
Loop
Label1.Caption = "MIDI播放时间" + Format(Minutes, "00") & ":" & _
Format((mtlength - (Minutes * 60)), "00.0")
sAllTime = Format(Minutes, "00") & ":" & Format((mtlength - (Minutes * 60)), "00.0")
'已经获得足够长度的MIDI文件信息,停止播放
Call objDMPerf.Stop(objDMSeg, Nothing, 0, 0)
objDMSeg.SetStandardMidiFile
Command2.Enabled = True
Else
Command2.Enabled = False
Command3.Enabled = False
Command4.Enabled = False
End If
End Sub
Private Sub Command2_Click()
Timer1.Enabled = True
If objDMSeg Is Nothing Then
MsgBox ("没有可以播放的MIDI文件,请先打开一个MIDI文件")
Exit Sub
End If
If fIsPaused Then '当前处于暂停状态
'获得暂停位置
Offset = lMTime - GetStartTime + Offset + 1
'设置开始播放点为暂停位置
Call objDMSeg.SetStartPoint(Offset)
'播放MIDI
Set objDMSegSt = objDMPerf.PlaySegment(objDMSeg, 0, 0)
fIsPaused = False
Sleep (90)
Else
Offset = 0
If objDMPerf.IsPlaying(objDMSeg, objDMSegSt) = True Then
'停止播放
Call objDMPerf.Stop(objDMSeg, objDMSegSt, 0, 0)
End If
objDMSeg.SetStartPoint (0)
Set objDMSegSt = objDMPerf.PlaySegment(objDMSeg, 0, 0)
Sleep (90)
End If
Command2.Enabled = False
Command3.Enabled = True
Command4.Enabled = True
End Sub
Private Sub Command3_Click()
On Error GoTo LocalErrors
If objDMSeg Is Nothing Then Exit Sub
If objDMPerf.IsPlaying(objDMSeg, objDMSegSt) = True Then
fIsPaused = True
'获得已经播放的长度
lMTime = objDMPerf.GetMusicTime()
GetStartTime = objDMSegSt.GetStartTime()
Call objDMPerf.Stop(objDMSeg, Nothing, 0, 0)
End If
Command2.Enabled = True
Command3.Enabled = False
Command4.Enabled = False
Exit Sub
LocalErrors:
Call Err.Raise(Err.Number, Err.Source, Err.Description)
End Sub
Private Sub Command4_Click()
If objDMSeg Is Nothing Then
Exit Sub
End If
fIsPaused = False
'停止播放MIDI文件
Call objDMPerf.Stop(objDMSeg, objDMSegSt, 0, 0)
End Sub
Private Sub Form_Load()
Me.Show
'建立DirectMusicLoader对象
Set objDMLoader = objDX.DirectMusicLoaderCreate
'建立DirectMusicPerformance对象
Set objDMPerf = objDX.DirectMusicPerformanceCreate
'初始化DirectMusicPerformance对象
objDMPerf.Init Nothing, 0
objDMPerf.SetPort -1, 80
objDMPerf.SetMasterAutoDownload (True)
objDMPerf.SetMasterVolume (-700)
Command1.Caption = "打开MIDI文件"
Command2.Caption = "播放"
Command3.Caption = "暂停"
Command4.Caption = "停止"
Command2.Enabled = False
Command3.Enabled = False
Command4.Enabled = False
Label1.Caption = ""
Label2.Caption = ""
Label3.Caption = ""
Timer1.Interval = 100
Timer1.Enabled = False
End Sub
Private Sub Form_Unload(Cancel As Integer)
Set objDMSegSt = Nothing
Set objDMSeg = Nothing
Set objDMPerf = Nothing
Set objDMLoader = Nothing
End
End Sub
Private Sub Timer1_Timer()
GetTimePassed
Label1.Caption = "MIDI播放时间:" + ElapsedTime + " 总时间:" + sAllTime
End Sub
运行程序,点击"打开MIDI文件"文件按钮打开一个MIDI文件,点击"播放"按钮播放文件,点击"暂停"按钮暂停播放,点击"停止"按钮停止播放。
上面的程序比较的简单,我就不做讲解了,大家可以自己分析。
由于DirectX编程是绕开了操作系统而直接对硬件进行操作,所以在编程过程中一定要比较的小心谨慎,由于Windows2000提供了对于DirectX的支持,如果有可能的化最好在Windows2000下编写,上面的程序就是我在Windows2000下编写运行调试后再在Windows98下检验的。并另外硬件对于程序的影响很大,上面的程序在你的机器上运行可能会有速度上的问题,我的机器配置是:赛羊500,128M内存,VooDoo3000, Yamaha 724声卡。
|